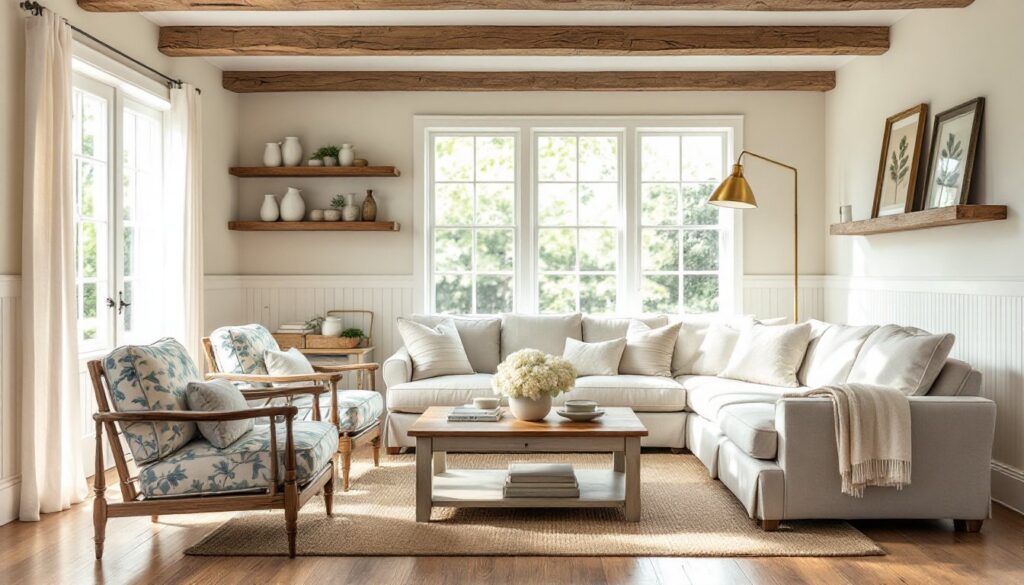
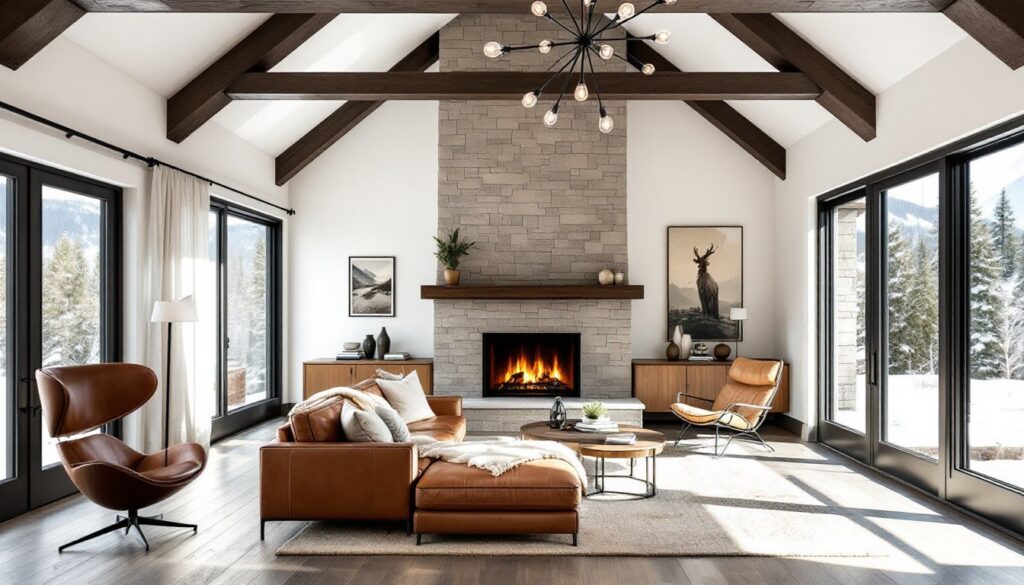
Before ripping out that kitchen wall or ordering custom cabinetry, wouldn’t it help to see exactly what the finished space will look like? That’s where 3D interior design rendering comes in. Instead of relying on flat sketches or guesswork, homeowners can now walk through a photorealistic version of their renovation before a single nail gets hammered. These digital visualizations show materials, lighting, furniture placement, and spatial flow with enough detail to catch design mistakes early, when they’re still cheap to fix. Whether planning a basement remodel or a whole-home refresh, 3D rendering services help DIYers and contractors alike avoid costly surprises.
Table of Contents
ToggleKey Takeaways
- 3D interior design rendering services create photorealistic digital visualizations that help homeowners and contractors catch design mistakes early, preventing costly mid-project changes and surprises.
- These renderings improve communication between homeowners and contractors by showing exact material choices, lighting, furniture placement, and spatial flow before construction begins.
- Common formats include static images ($200–$500 per room), 360-degree panoramas, virtual reality walkthroughs, and fly-through videos, with costs increasing based on complexity and interactivity.
- Homeowners should choose rendering services based on portfolio quality, turnaround time, revision policies, and the provider’s ability to integrate real product specifications and materials.
- 3D rendering services function as detailed roadmaps for DIY projects, helping with work sequencing, permit applications, and testing multiple design options without ordering physical samples.
- Accurate initial measurements and clear design references reduce revisions and costs, making the investment in rendering typically worthwhile by preventing expensive mid-renovation decisions.
What Are 3D Interior Design Rendering Services?
3D interior design rendering services create photorealistic digital images of interior spaces using specialized software. Think of it as architectural photography for rooms that don’t exist yet.
Designers and rendering specialists build virtual models based on floor plans, elevation drawings, or even rough sketches. They add textures (wood grain, tile patterns, fabric weaves), accurate lighting (natural daylight, recessed fixtures, pendants), and furnishings to show how a space will actually look and feel.
The output can range from static images, perfect for presentations or permit applications, to interactive 360-degree views that let homeowners “walk” through their future kitchen or bath. Some services also produce fly-through videos that move through multiple rooms, showing spatial relationships that flat drawings miss.
Unlike traditional 2D blueprints, 3D renderings communicate design intent to everyone on the project: the homeowner who’s writing the checks, the contractor framing the walls, and the tile installer laying herringbone backsplash. When everyone sees the same vision, fewer change orders happen mid-project.
Why Homeowners Should Use 3D Rendering Before Renovating
Most renovation regrets stem from imagination failures. A paint color looks different at scale. That island feels too big once it’s installed. The sightline from the living room into the kitchen? Blocked by a poorly placed column.
3D renderings eliminate guesswork. Homeowners can test multiple layouts, compare cabinet finishes, and see how afternoon sunlight will hit that new reading nook, all before ordering materials. If the rendering shows that the planned furniture won’t fit or the traffic flow feels cramped, adjustments cost nothing but a few hours of digital revisions.
They also improve communication with contractors. Saying “I want a modern farmhouse kitchen” means different things to different people. A rendering shows exactly which shade of white, what style of hardware, and how much open shelving versus closed cabinetry the homeowner expects. That clarity reduces back-and-forth, change orders, and the tension that comes with mismatched expectations.
For DIYers tackling their own projects, renderings function like a detailed roadmap. Seeing the finished space helps with sequencing work (drywall before trim, paint before fixtures) and catching potential problems like outlet placement or insufficient clearance around doors.
Permit applications also benefit. Many building departments accept 3D renderings alongside traditional plans, and the visual clarity can speed approval for complex projects like load-bearing wall removal or structural modifications.
How 3D Interior Rendering Works: From Concept to Visualization
The process typically starts with measurements and reference materials. The rendering service needs accurate dimensions: wall lengths, ceiling heights, window and door locations, and any fixed elements like fireplaces or structural columns. Floor plans work well, but even hand-drawn sketches with measurements can get the job started.
Next, the designer builds a digital model using software like SketchUp, Blender, 3ds Max, or specialized interior design platforms. They construct walls, insert windows and doors, and create the room’s basic geometry. Accuracy here matters, off by a few inches, and furniture won’t fit or that built-in bookcase won’t align with the window trim.
Once the shell is built, materials get applied. The designer adds textures: hardwood flooring with realistic grain patterns, subway tile backsplash with grout lines, quartz countertops with accurate veining. Many services pull from libraries of real manufacturer products, so the rendering can show the exact LVP (luxury vinyl plank) or paint color the homeowner plans to buy.
Lighting comes next. The designer places light sources, windows for natural light, recessed cans, pendants, sconces, and adjusts intensity and color temperature. Proper lighting makes the difference between a flat, video-game look and a photorealistic image that feels lived-in.
Finally, the software renders the scene, calculating how light bounces off surfaces, creates shadows, and interacts with materials. High-quality renders can take hours to process, depending on complexity and resolution. The result? Images sharp enough to show wood grain texture and subtle paint sheen differences.
Types of 3D Rendering Services for Home Projects
Static photorealistic images are the most common format. These high-resolution stills show the space from carefully chosen angles, much like professional real estate photography. They’re ideal for client presentations, social media sharing, or printing for mood boards. Most services deliver 3-5 views per room.
360-degree panoramas let viewers rotate the camera and look around the entire room from a fixed point. These work well for understanding spatial relationships and getting a feel for how open or enclosed a space feels. Homeowners can share a link and family members can “stand” in the virtual room and offer feedback.
Virtual reality (VR) walkthroughs take immersion further. Using a VR headset, users can move through the space, change viewing height, and get a true sense of scale. This technology is still relatively expensive and requires specialized equipment, but some high-end rendering services and design firms offer it for large-scale renovations.
Animation and fly-through videos show movement through multiple rooms or highlight specific features with camera pans and zooms. A 30-60 second video can demonstrate flow from the entryway through the kitchen to the outdoor deck, showing how spaces connect. These are especially useful for open-concept layouts or whole-home remodels.
Some services also offer material and finish comparisons, rendering the same space with different countertop choices, cabinet colors, or flooring options side-by-side. This helps homeowners make confident decisions without ordering multiple samples or relying solely on small swatches.
Choosing the Right 3D Rendering Service for Your Home
Start by checking portfolios. Look for renderings that match the style and complexity of the project. A service that specializes in modern minimalist condos might not be the best fit for a traditional craftsman kitchen remodel. Pay attention to material realism, does the wood look like wood, or does it have that plastic CG sheen?
Turnaround time matters, especially if working against a contractor’s schedule. Some services deliver initial renderings in 3-5 business days: others take two weeks or more. Rush fees are common, so plan ahead when possible.
Revisions are part of the process. Most packages include 2-3 rounds of changes (adjusting paint colors, swapping light fixtures, tweaking furniture placement). Understand what’s included upfront and what triggers additional fees. Unlimited revisions sound appealing but often come with higher base prices.
Communication style is underrated. The best rendering services ask detailed questions upfront: What’s the primary use of the space? What time of day should the lighting reflect? Are there specific products or brands to include? Services that just take a floor plan and run with it often miss the mark on the first attempt.
Consider whether the service works with real product specifications. Platforms like Houzz and Homify showcase designers who can integrate actual manufacturer products into renderings, which helps when it’s time to order materials. Some rendering specialists even pull from Homedit inspiration galleries to match specific aesthetics.
For DIYers managing their own projects, look for services offering file formats compatible with common design software. Getting access to the 3D model itself (not just the rendered images) allows for future tweaks or additional views without starting from scratch.
Cost Breakdown: What to Expect When Hiring 3D Rendering Services
Pricing varies widely based on complexity, turnaround time, and output format. Expect to pay $200-$500 per room for basic static renderings with standard finishes and straightforward layouts. That typically includes 2-3 camera angles and a couple rounds of revisions.
Complex spaces run higher. Kitchens with custom cabinetry, detailed tile work, and multiple lighting layers often fall in the $500-$1,200 range. Bathrooms with intricate tile patterns, frameless shower enclosures, and high-end fixtures hit similar price points. Whole-home packages (5+ rooms) sometimes offer per-room discounts, bringing costs down to $300-$400 per space.
360-degree panoramas and VR experiences add $100-$300 per room on top of static rendering fees, depending on the platform and level of interactivity. Fly-through animations typically cost $1,000-$3,000 for a 30-60 second video covering multiple rooms, with pricing influenced by video length, transitions, and complexity.
Rush fees are standard. Asking for delivery in 24-48 hours can add 25-50% to the base price. Extra revision rounds beyond what’s included usually cost $50-$150 per round, depending on the scope of changes.
Geography affects pricing less than it used to, since many services operate remotely. But, working with a local designer who can visit the site in person may cost more upfront but can improve accuracy, especially for older homes with quirks that don’t show up on basic floor plans.
Budget-conscious homeowners can reduce costs by providing detailed, accurate measurements and clear reference images upfront. The more guesswork the rendering service has to do, the more time (and money) the project will require. Applying interior design fundamentals before engaging a rendering service also helps clarify the vision, reducing revision cycles.
Conclusion
3D rendering services bridge the gap between imagination and reality, giving homeowners a clear view of their renovation before committing to materials or labor. They catch design problems early, improve contractor communication, and help make confident decisions on finishes and layouts. For anyone planning a significant remodel, the investment in rendering often pays for itself by preventing expensive mid-project changes. Browse the interior design archives for more project inspiration and practical renovation guidance.